Volume Surface Calculation and Surface Analyzing–Part 3
Creating Grid Ticks
There are 2 ways to create grid ticks. Creating spot elevation labels along a surface is a new feature in 2009, but will not allow to change the style so that the cut/fill points will display properly. The best way I have found is to create points along a grid and place them in points groups for display.
Creating points on a grid
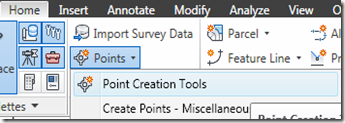
Start by pulling up the Point Creation Tools
Ribbon > Home > Create Ground Data > Points > Point Creation Tools
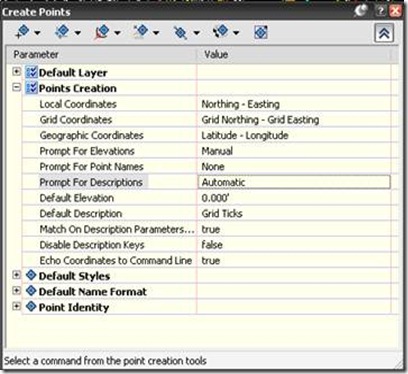
The point toolbar will pop up. Pull out the create points dialog button on the right of the toolbar. Set the prompt for Descriptions to automatic and under Default Description add a description like grid ticks. Now it is time to create some points
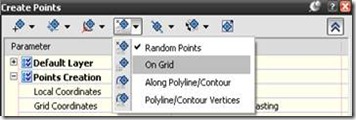
Under surface points select On Grid.
The software will ask for the surface, select the volume surface. The grid base point will be the bottom left side of the drawing. The next few steps will be filling out the rotation and grid spacing. Once done with the points, the software defaults to asking to create more points on a grid. Enter out.
Dividing Points into Groups
Now that we have points, we need to place them into point groups.
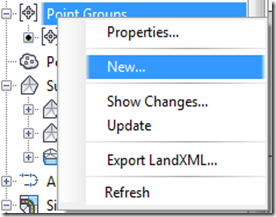
The first thing we need to do is create a point group. Under toolspace, right click the point group and select new.
When creating point groups for grid ticks I use point styles to help define if the surface is needed to be cut or filled. I use the green for fill and red for cut.
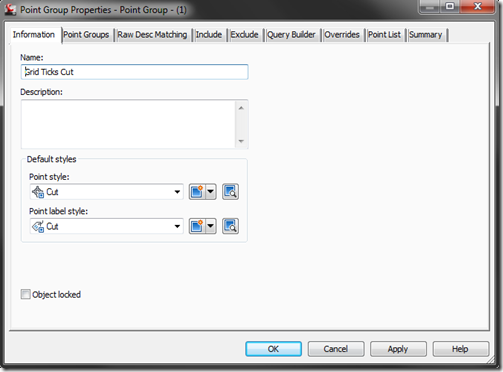
Under the include tab, check the “with elevations matching box” for fill place <0 and for cut place >0. Also check the box marked “with raw description matching” and place the name given when creating the points on grid.
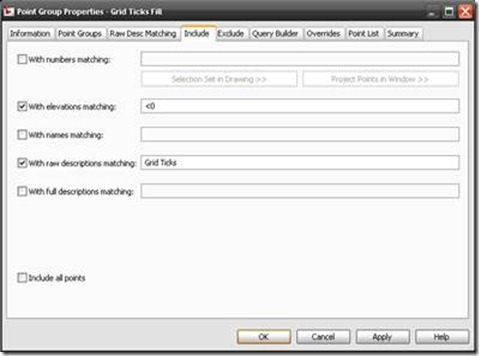
In the exclude tab, under the “with elevation matching” field, place the same elevation information. I know it is odd including <0 and then excluding <0, but for some reason it is the only way the software can recognize just points related to grid ticks. Once done, click OK.
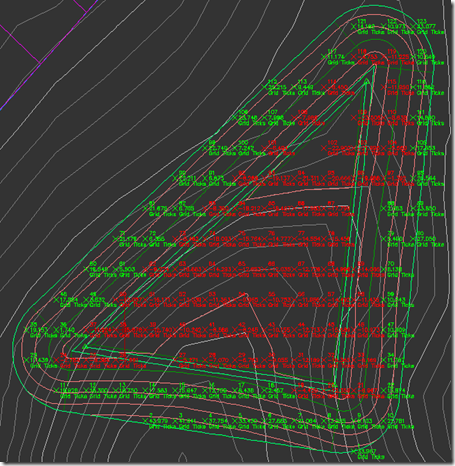
Now you have grid ticks showing your fill and cut needed on the project.
There are 2 ways to create grid ticks. Creating spot elevation labels along a surface is a new feature in 2009, but will not allow to change the style so that the cut/fill points will display properly. The best way I have found is to create points along a grid and place them in points groups for display.
Creating points on a grid
Start by pulling up the Point Creation Tools
Ribbon > Home > Create Ground Data > Points > Point Creation Tools

The point toolbar will pop up. Pull out the create points dialog button on the right of the toolbar. Set the prompt for Descriptions to automatic and under Default Description add a description like grid ticks. Now it is time to create some points

Under surface points select On Grid.

The software will ask for the surface, select the volume surface. The grid base point will be the bottom left side of the drawing. The next few steps will be filling out the rotation and grid spacing. Once done with the points, the software defaults to asking to create more points on a grid. Enter out.
Dividing Points into Groups
Now that we have points, we need to place them into point groups.
The first thing we need to do is create a point group. Under toolspace, right click the point group and select new.

When creating point groups for grid ticks I use point styles to help define if the surface is needed to be cut or filled. I use the green for fill and red for cut.

Under the include tab, check the “with elevations matching box” for fill place <0 and for cut place >0. Also check the box marked “with raw description matching” and place the name given when creating the points on grid.

In the exclude tab, under the “with elevation matching” field, place the same elevation information. I know it is odd including <0 and then excluding <0, but for some reason it is the only way the software can recognize just points related to grid ticks. Once done, click OK.
Now you have grid ticks showing your fill and cut needed on the project.
